Have you brought some interest in learning how to wire golf car batteries? With just a few tools and materials, wiring your golf cart battery is much easier than you think. Even if you are a DIY enthusiast or have the ambition to learn something new, it is possible to successfully wire a golf cart battery. Our team at Hartville Golf Carts have created a series of resourceful articles to enlighten you with all your golf cart inquiries. In this article, we will assist you through every step of the process safely and efficiently connecting the battery cells of your golf cart.
The Basics of Wiring Golf Cart Batteries: A Pre-Introduction
Throughout the years, golf carts have become an increasingly popular investment amongst golfers and owners of large estates. Golf carts have been relied on for driving short distances, running errands, and through eighteen rounds of golf. However, by keeping your golf cart running smoothly, it is extremely essential to understand the basics on how to wire your golf cart batteries correctly without error. The battery in a golf cart powers the motor and other electrical components, making it crucial to have proper wiring. Just by taking a proper look at it, the wiring may appear to look like a rocket science job for a beginner, but with a little added knowledge of electrical wiring, you will be an expert in no time.
Safety Measures to Wiring Golf Cart Batteries & It’s Importance
A top priority that we recommend when it comes to wiring the batteries in your golf cart is to take a deep consideration of your safety right before you begin the wiring process. By starting this step, make sure that your golf cart is completely turned off and the keys have been removed to prevent any further electrical hazards. Next, you will need insulated gloves and eye protection when overseeing the batteries to prevent any battery acid from splashing onto your skin and eyes. Another safety measure to consider is placing your batteries in a well-ventilated area to avoid the buildup of toxic fumes.
One last consideration to make while safely wiring your golf cart battery is always to double-check your connections to ensure that the wiring is properly secured and that there are no loose cables that may pose a safety risk. When you follow these basic safety measures, you will be able to prevent any danger to yourself and you will be able to take that golf cart for a spin on another adventurous day out on the golf course.
Understand the components of golf cart battery wiring
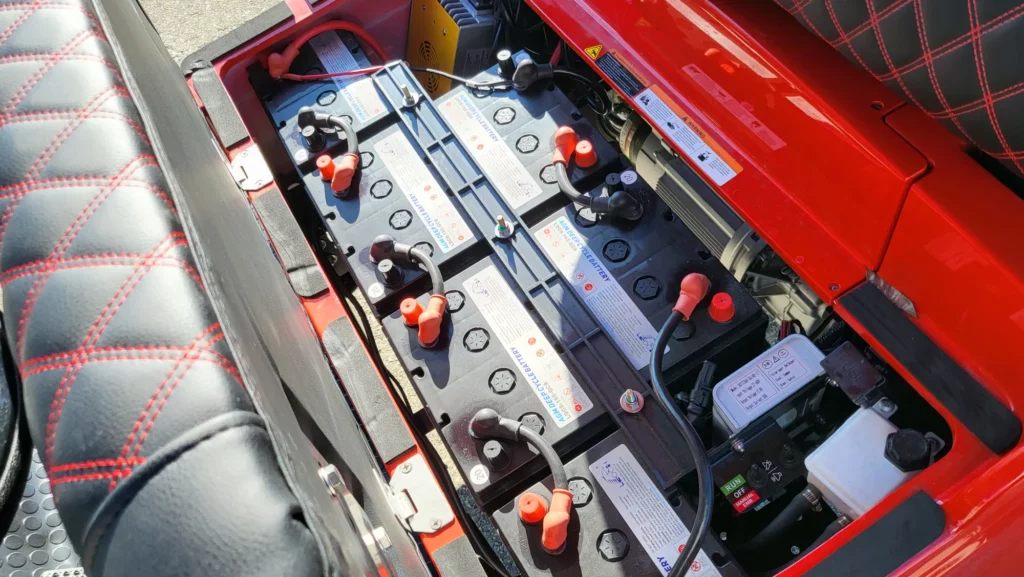
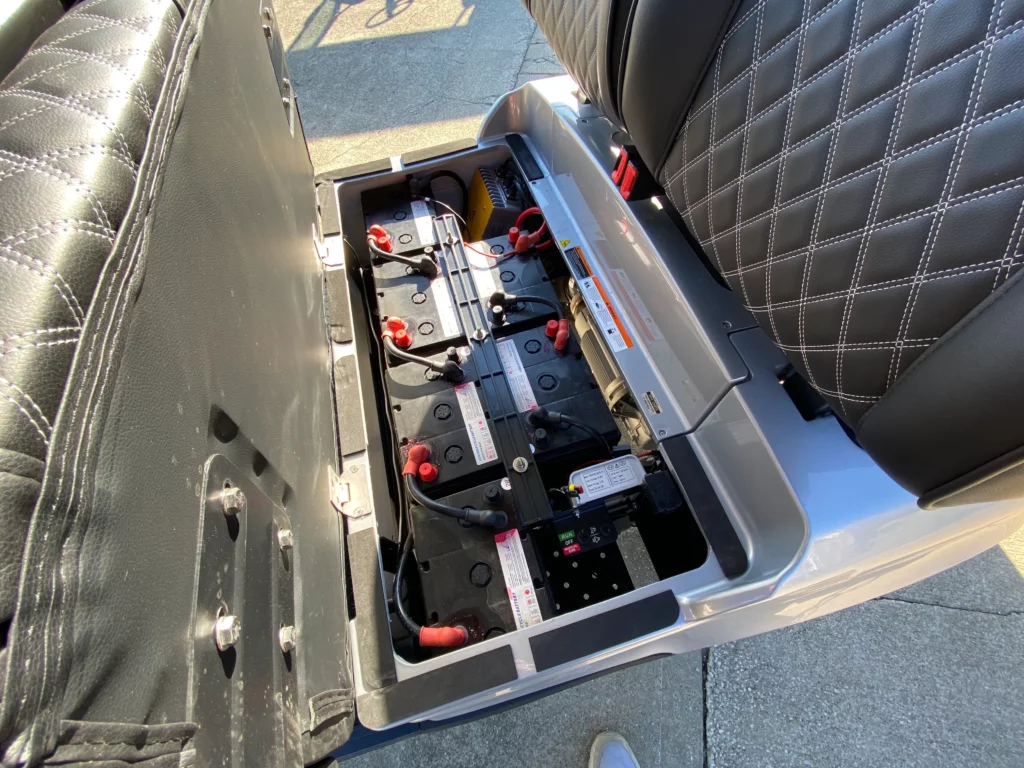
The proper wiring of your golf cart battery may seem to be an overwhelming process, but when you understand the components to your battery, you will have a critical level of knowledge to maintaining the battery’s lifespan and setting yourself up for a smooth ride. The wiring consists of three main components: the battery pack, the wiring harness, and the charger. The battery pack is composed of multiple batteries wired together to provide the necessary voltage to power the golf cart. The wiring harness connects the batteries to the controller, the motor, and the other electrical components in your golf cart. And the charger replenishes the battery pack by providing a safe and proper charge. When you familiarize yourself with these key components, you will have the ability to troubleshoot the issues in your golf cart battery and you will allow your golf cart to run successfully for years to come.
Outlining the Steps to Wiring a Single 6-Volt Battery
If you are an owner of a single 6-volt battery and wish to learn how to wire it, there are a few important steps that you will need to follow to confirm that it is done safely and correctly. By starting, you will need to identify the positive and negative terminals on your battery. This is usually indicated by a plus and a minus signs, or the colors red and black. The next step is connecting a wire to the positive terminal of the battery and another wire to the negative terminal. These wires will be used to connect to the device or the circuit you are attempting to power. It is critically important to ensure that the wires are securely attached to the battery terminals to prevent any electrical shortages or small to fatal accidents. To briefly summarize, wiring a single 6-volt battery in your golf cart is not too much of a complex task if you are able to follow these basic steps and that you are properly connecting the wires with proper care.
Outlining the Steps to Wiring Two 12-Volt Batteries in Series
You will find it extremely common that the writing of two 12-volt batteries in a series is not only practiced in golf carts but is practiced in numerous applications such as in RVs and boats! Now that is power. This process involves connecting the positive terminal of one battery to the negative terminal of the other, leaving a positive and negative terminal free of use. This resulting configuration additionally doubles the voltage output of the two batteries. However, it is critical to remember that the total ampere-hour capacity remains the same. It is crucial to confirm that you have the right components and wiring techniques to make the circuit in your 12-volt batteries dependable and safe. Wiring any batteries in series should be done with proper care, and we highly recommend seeking professional help with your golf cart vendor to avoid any potential damage or hazards.
Outlining the Steps to Wiring Two 12-Volt Batteries in Parallel
Although it may appear to be a daunting task, it is straightforward when it comes to wiring two 12-volt batteries in parallel for your golf cart. First, you will need to ensure that both batteries have an equal charge. Then you will need a few tools for this job. These tools include a wire cutter and crimper, battery cables, and a connection plate. The next step you will take is by connecting the positive terminal of battery one to the positive terminal of battery two using a battery cable. Additionally, you will need to repeat this step for the negative terminals. The ultimate step you will need to wire two 12-volt batteries to your golf cart is by connecting a connection plate to the exposed positive terminals and once more to the negative ones. And just like that, you have successfully wired two 12-volt batteries to your golf cart in parallel, giving your golf cart an increase to its overall input and the edge to win out on the greens.
Concluding
To briefly summarize, wiring golf cart batteries can be a simple task that anyone can do rather you are a newcomer or a seasoned veteran in the game of DIY and golf. And now that you have an understanding on the importance of following the safety measures while wiring your golf cart batteries, a brief understanding on the components of wiring your golf cart battery, a detailed outline on wiring 6-volt batteries on your golf cart and by wiring two 12-volt batteries in series and parallel, you will have the edge to succeed in tackling this critical task in ensuring that you are winning with a top-notch golf cart that takes you out to the jaws of victory out on the golf course.
With just these few simple steps you will have a boost of confidence in wiring your golf cart battery with ease. We here at Hartville Golf Carts are dedicated and enthusiastic to providing you with the tools to succeed in understanding all aspects of golf carts and to add more enthusiasm to your drive to take extraordinary pride in your investment.